Next time you're in the dollar store, grab one of these snack platter trays. You will need post it's or labels to jazz it up therapy style.

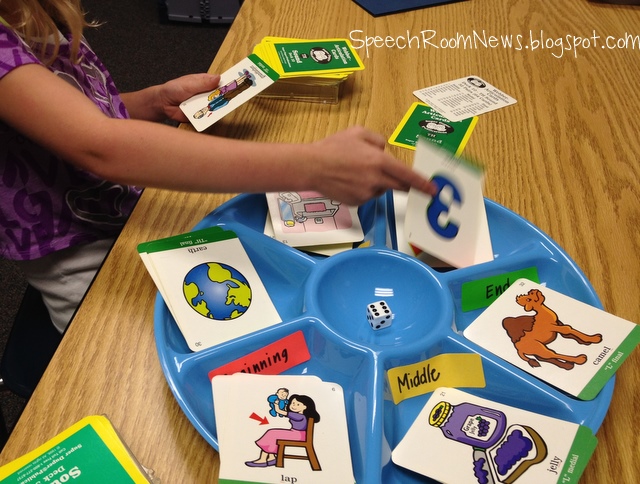
First step- - label the trays with numbers 1-6 on the outside and beginning, middle, end on the inside. Then grab articulation or language card decks depending on your group!

This first articulation activity focuses on using my Super Duper articulation cards. This will work perfectly with one or two students. If you have more you can put them on teams.

Each child or team should have the beginning/middle/end words facing them. They place their full deck beside the tray and a die in the middle of the tray. At their turn they roll the die. They then remove that number of cards from their deck. Next they sort the cards according to the position of their target sound in the word (B/M/E).
Play continues with each student/team rolling the die to see how many cards to sort, the students saying their words and sorting them. The winner of the game is the team with all their cards gone first! If you want to play collaboratively you wouldn't need a winner.

I also played a similar version with some of my /r/ groups. I gave them the cards and then they made up a silly sentence in the order that their cards were shuffled into the B/M/E slots. IE: The thief stole a spider covered in purple paint! Great for sentence and carryover level of instruction!

For my language focused groups, we used the numbers on the outside of the of the tray. I assigned each student in the group a number 1-4 and 5/6 were throw aways. I placed a language fun deck - Classification in this example - in the center of the table.

On their turn the students picked a card, answered their learning target and then rolled the die. They gave the card (put it into the tray) to whichever number they rolled. In the end the student with the most cards in their designated number was the winner. It's an easy way to spice up work with the fun decks of cards!

I also used the tray with the Rory's Story Cubes (which are a great activity if you don't have them you should check them out!) I had a group of 4 during this group. We each selected a story cube and rolled it in the tray. This certainly helped keep them from rolling off the table. Then we told the story as a group, each student was responsible for their part of the story based on their cube and their positions in the tray (1-6)! It was a fun way to spice up the way we usually use the cubes! After we told the story we reviewed the elements of stories (character, actions, setting, resolution, etc.) If we needed to revise we could easily do that.

We also used these in a group of two students, with the B/M/E stickers! Each kiddo used 3 of the cubes and told mini stories. Apparently I didn't grab a picture of that one!
Well that was it for my first day of winging it with the party tray! I have a feeling the ideas will be spilling out of my brain for it! I will keep updating you as I use it in new ways! Got any ideas right off the bat? I'm thinking it might lend nicely to category sorting for preschool tomorrow!